Getting started
Prefer to see it in action? Open the guided walkthrough — an animated, click-by-click tour you can play automatically or step through yourself.
You can be up and running in under fifteen minutes. This guide walks the whole journey: install the app, choose a plan, connect Amazon, and complete the on-screen setup checklist. The app guides you through each step, so this page is a heads-up of what to expect.
Before you begin
- A Shopify store where you are the owner or a staff member with permission to install apps.
- An Amazon Seller Central account in the region you sell in (North America, Europe, or the Far East).
- A payment card on your Shopify account. Paid plans include a 14-day free trial, so you are not charged on the day you install.
Step 1 — Install the app
Install Amazon Seller Sync from the Shopify App Store. Shopify shows you the permissions the app requests and asks you to confirm the store you are installing on.
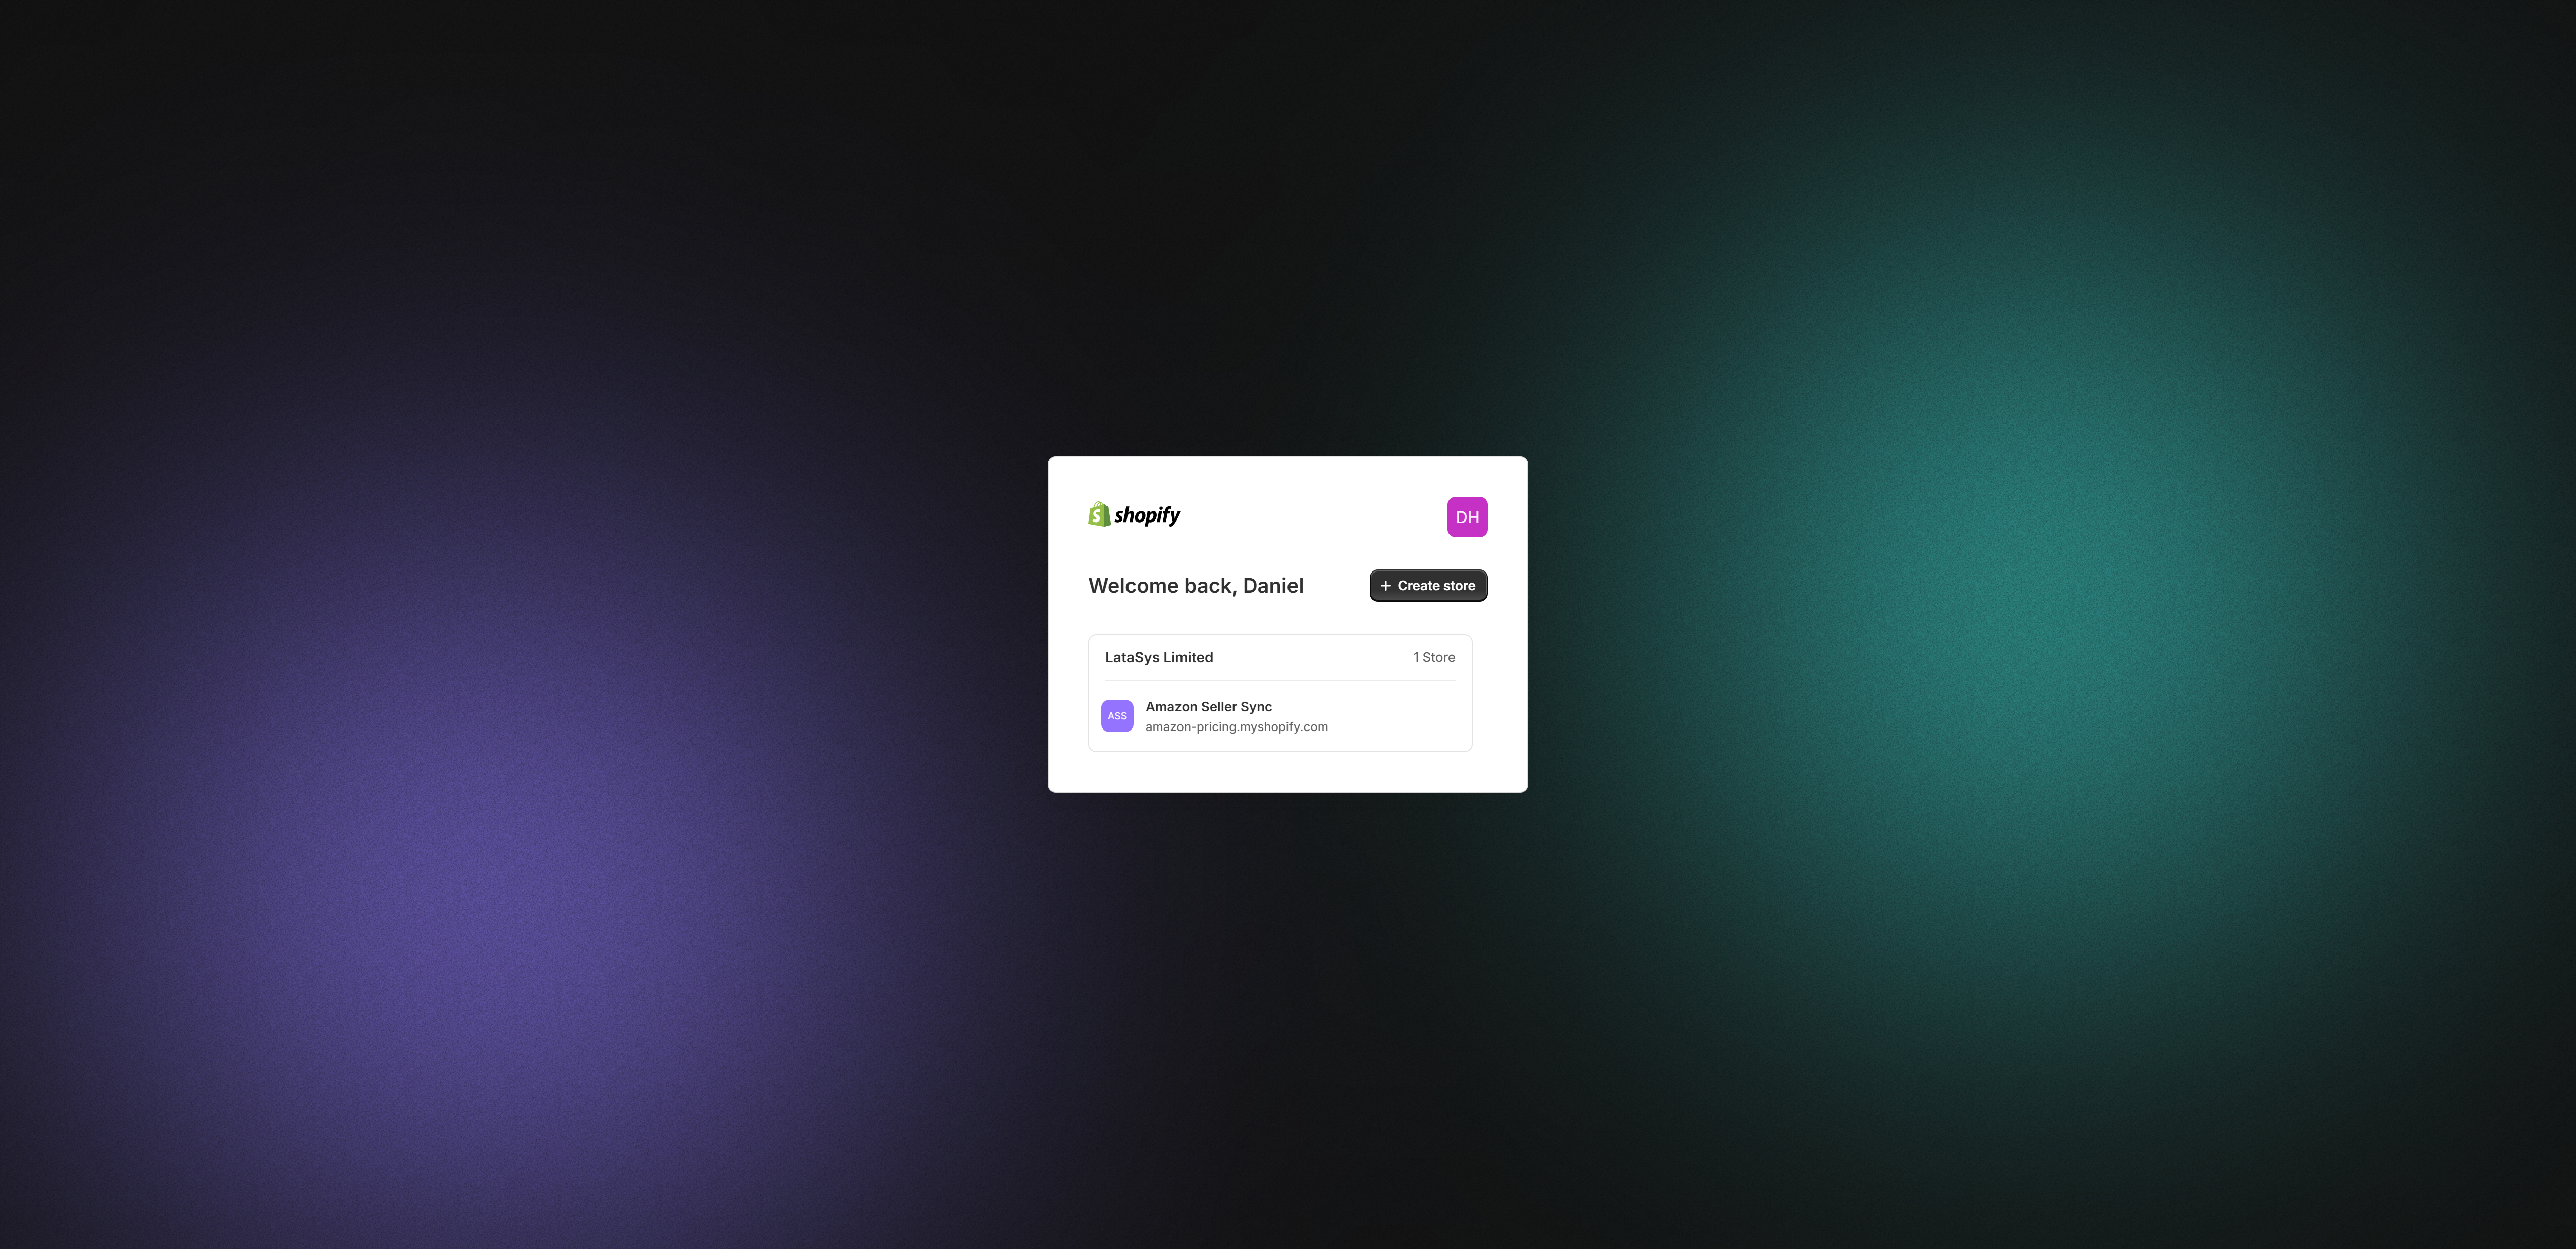
When you approve, Shopify shows the access grant screen. Review it and select Install. Shopify then returns you to the app inside your Admin.
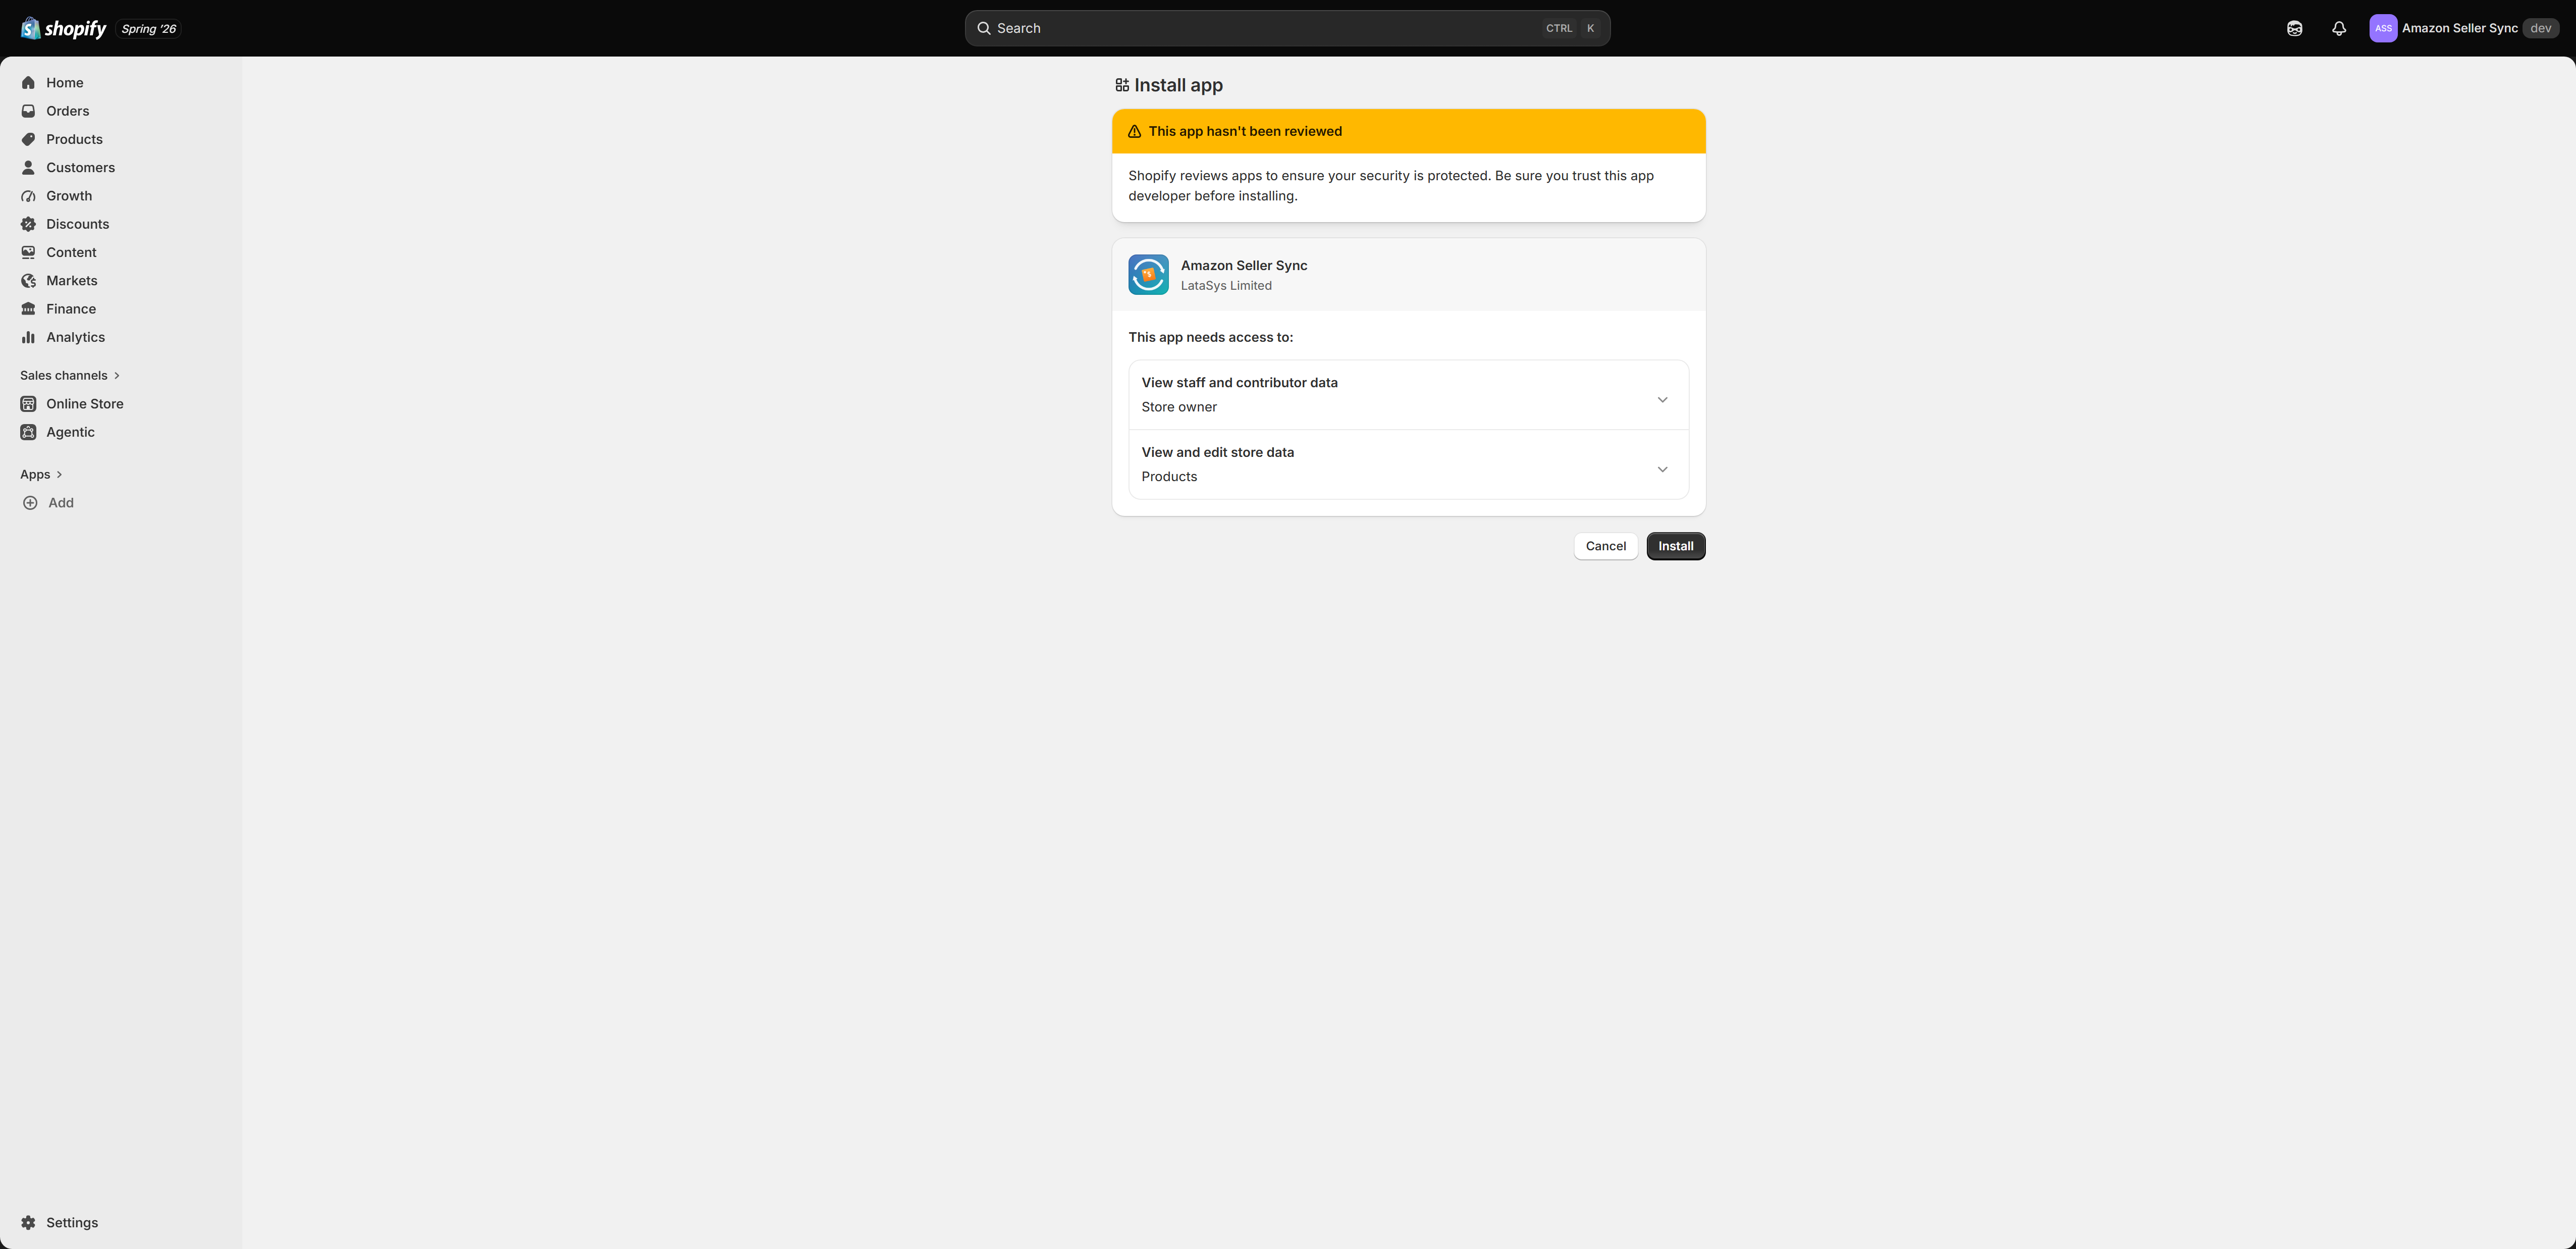
The app only requests the permissions it needs to do its job. Fulfilment by Amazon asks for extra order and fulfilment permissions later, and only when you choose to turn that feature on.
Step 2 — Choose a plan
The first screen after install is Choose a plan to get started. Pick the plan that fits your catalogue and the markets you sell in. Every paid plan includes a 14-day free trial, so you will not be charged today. If you would rather start small, choose Start on the Free plan and upgrade whenever you are ready.
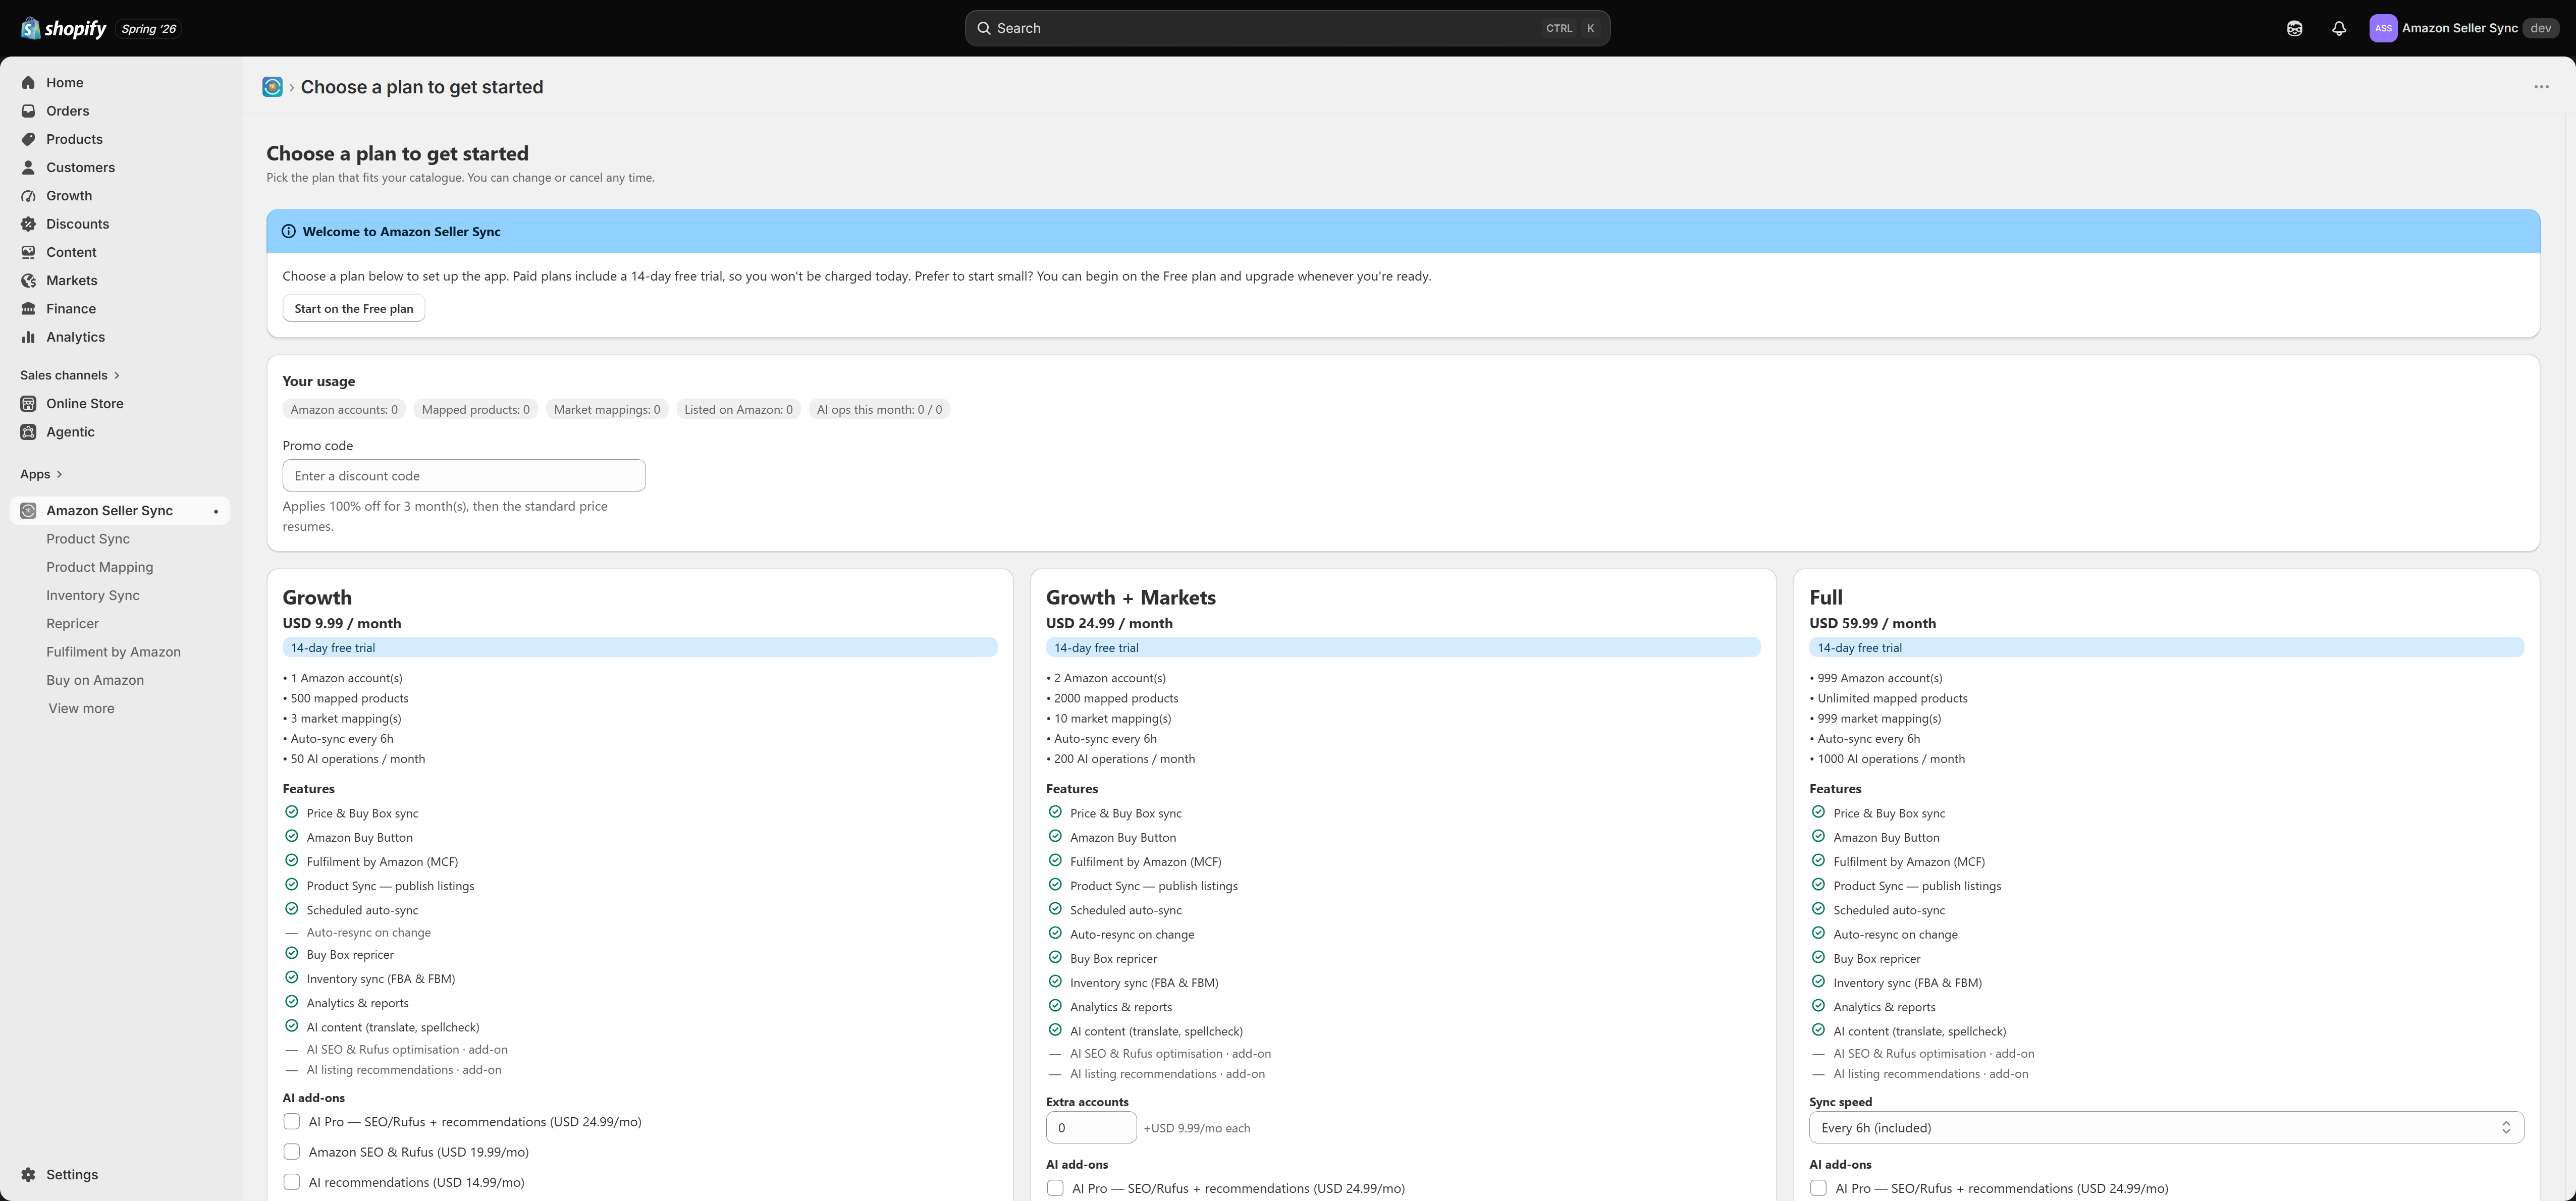
Each plan card lists exactly what it includes, so you can see at a glance which features are in your plan and which are paid add-ons. For a full comparison, see Plans and billing.
Price and Buy Box sync, the Amazon Buy Button, and Fulfilment by Amazon are available on every plan, including Free. Product Sync, the Repricer, Inventory Sync, Analytics, and AI content unlock on the paid plans.
Step 3 — Complete the setup checklist
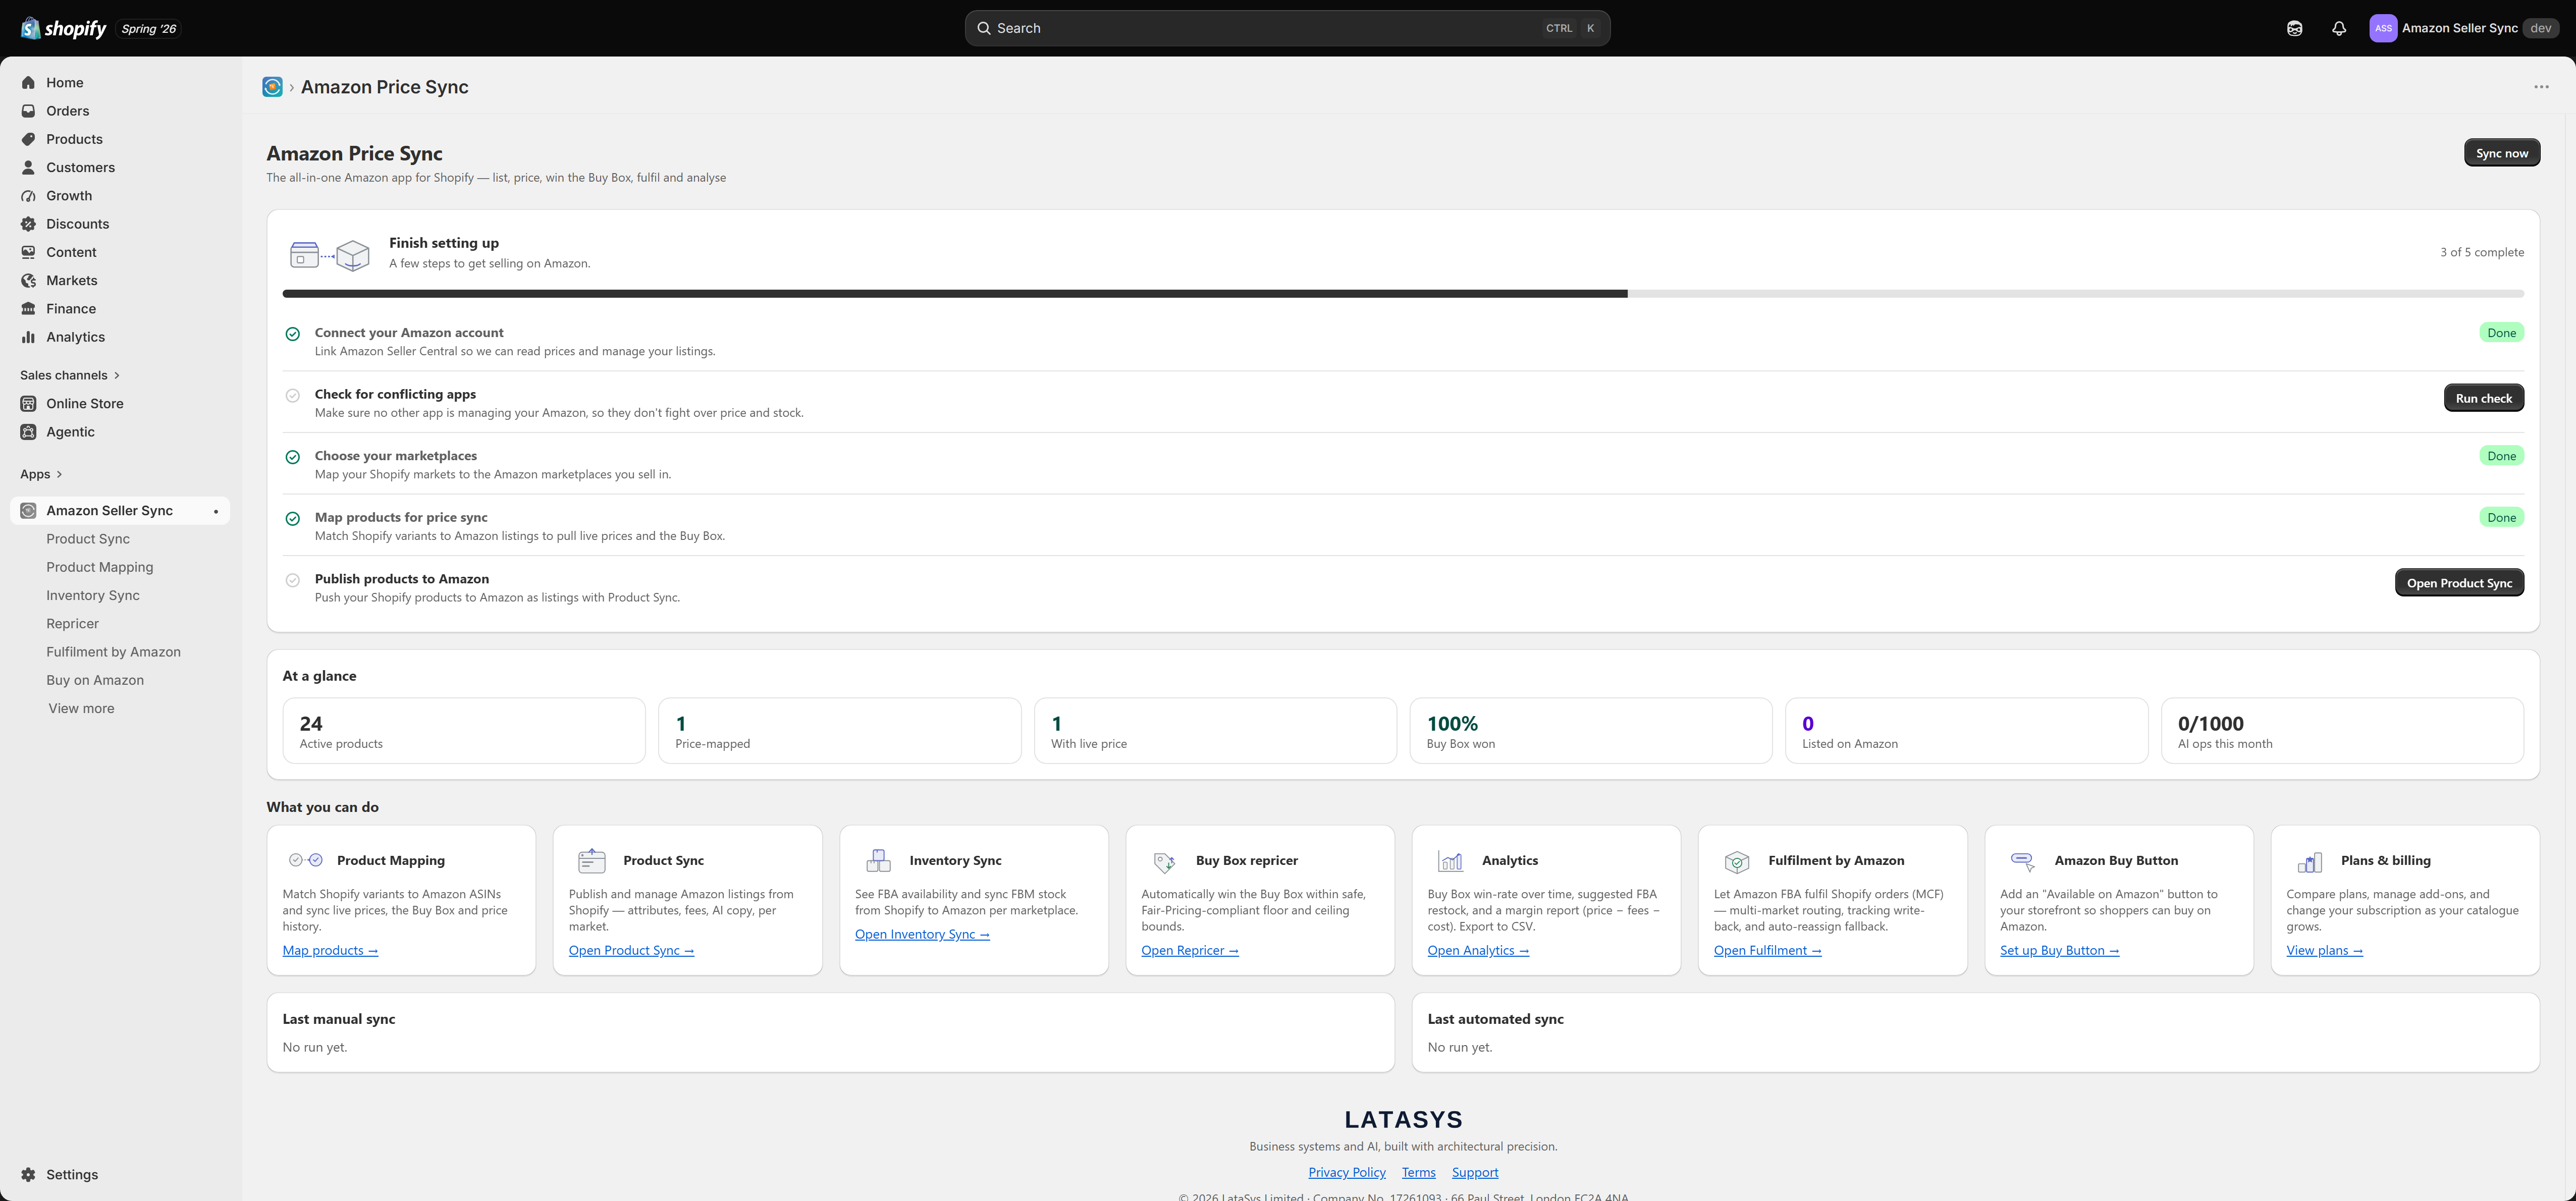
Once you have a plan, you land on the Home dashboard. The Finish setting up card at the top is your checklist. It tracks five steps and marks each one done as you complete it.
Connect your Amazon account
Choose the region your Amazon Seller Central account belongs to (North America, Europe, or Far East) and select Connect Amazon. You are taken to Amazon to authorise the app, then returned to Shopify. You can connect more than one account if your plan allows it — for example a North America account and a European account.
Check for conflicting apps
If another app on your store already manages your Amazon listings, pricing, inventory, or fulfilment, running two apps against the same listings makes prices and stock flip back and forth. Select Run check and tell the app what the other app handles. It guides you to switch those functions off, then rechecks. See Managing your plan for the full flow.
Choose your marketplaces
Map your Shopify markets to the Amazon marketplaces you sell in. The default (home) marketplace is used for automated price sync and the home price. On paid plans you can also map individual Shopify markets to specific Amazon marketplaces for localised pricing. See Settings.
Map products for price sync
Match your Shopify variants to Amazon listings so the app can pull live prices and the Buy Box. See Product Mapping.
Publish products to Amazon
When you are ready to create Amazon listings from your Shopify products, open Product Sync.
What "done" looks like
- The Finish setting up card shows all five steps complete and can be dismissed.
- The At a glance stat tiles show live numbers — active products, price-mapped variants, variants with a live Amazon price, your Buy Box win rate, and how many products are listed on Amazon.
- The Sync health view flags any listings that need attention.
From here, work through the feature pages in this section. A good order is Product Mapping to get live prices, then Product Sync to publish listings, then the Repricer and Analytics once you have live data.